The main role of DNS service is to be a the only communication between domain services and servers to work. There are a plenty of examples and hosting providers that explain in details how you can control your domain even from your control panel - cPanel, Plesk, DirectAdmin. Here, in our article, we will give you a quick tip on how to add your own DNS records and manage your DNS in your DirectAdmin control panel.
1. First you need to do is to login into your DirectAdmin control panel by visiting:
https://domainname.com:2222 or https://IP-address:2222 or https://server-hostname:2222.
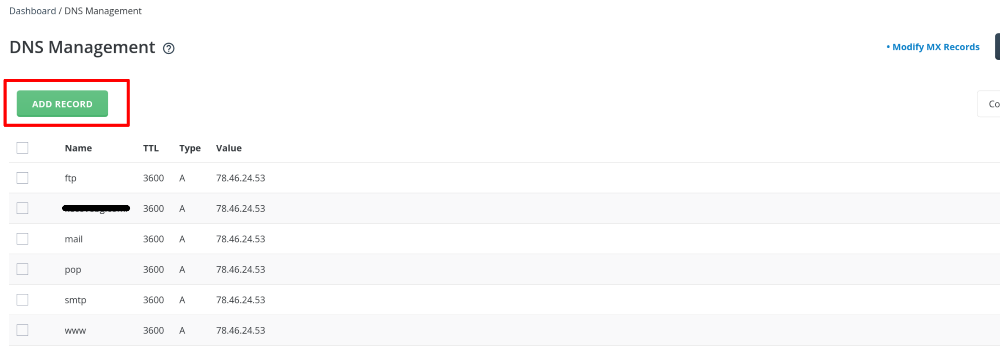
2. Go to Account Manager → DNS Management.
3. Now you can add new DNS Record → Click on ADD Record.
4. Please, Select the Record Type (A, CNAME, TXT, MX,etc), Enter Name and Value of TTL, than Click on ADD.
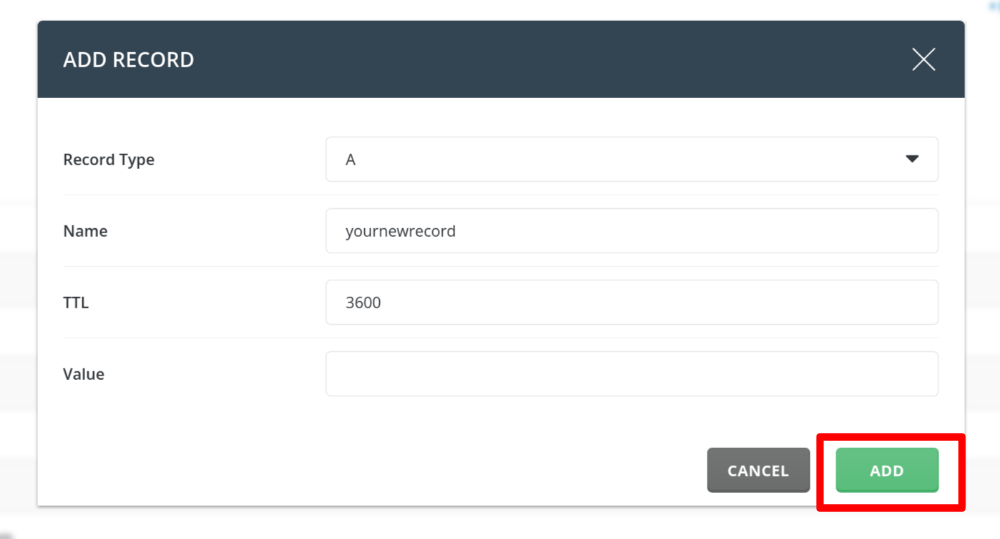
5. You are done! Your DNS record is added.
Note: You can also edit and delete records. The deletion is possible once you select it by clicking on a left of your record. The same way you can edit the record by clicking in the pen right on the record.