Websites hosted with us can have their website hosted with Shopify while keeping email services with us. The DNS Management is easily updated via CooliceHost's DirectAdmin control panel. A great way to host your emails and client correspondence at one place and having SaaS services on another.
First you need to do is to have your domain name pointing to your hosting account with us. The DNS records are in your setup email, received once you have ordered an plan from CooliceHost. Once you setup them you can log to your control panel and search for a DNS Management option.

Although not used for web content, your hosting package is used for your email services.
Once you have added your domain to Shopify, proceed with Connecting your domain to Shopify by updating your domain DNS settings from your CooliceHost control panel, the steps are:
Set up DNS pointing to Shopify
1. Browse to CooliceHost and log in at Admin Panel
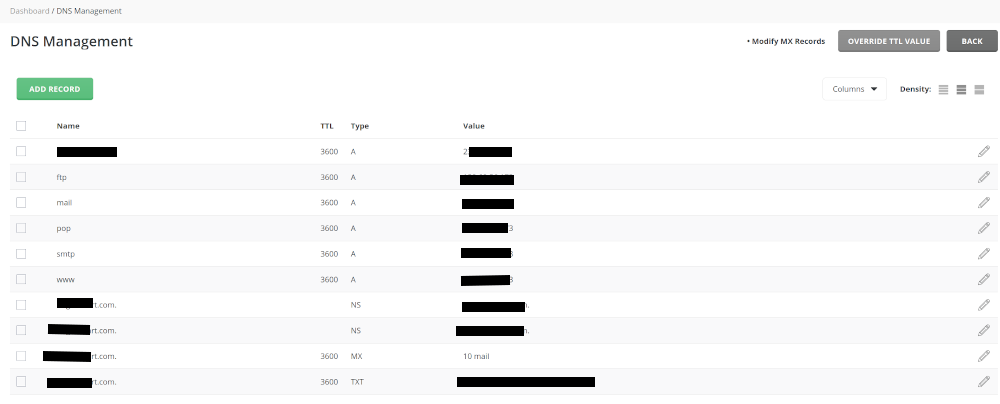
2. From the search bar type DNS Management
3. Go to the list of records and start editing them
Note: You want see this function if the domain is not pointed to our hosting.

4. Change the relevant A- and Cname-records as follows:
Hostname @:
- Select A records (if these is none, Add it) and find the @ row
- Change the Value destination IP to 23.227.38.32 by clicking in that field and editing
- Click Save / Add

Hostname www:
- Delete the A record type www by clicking the trashcan on the right of that row
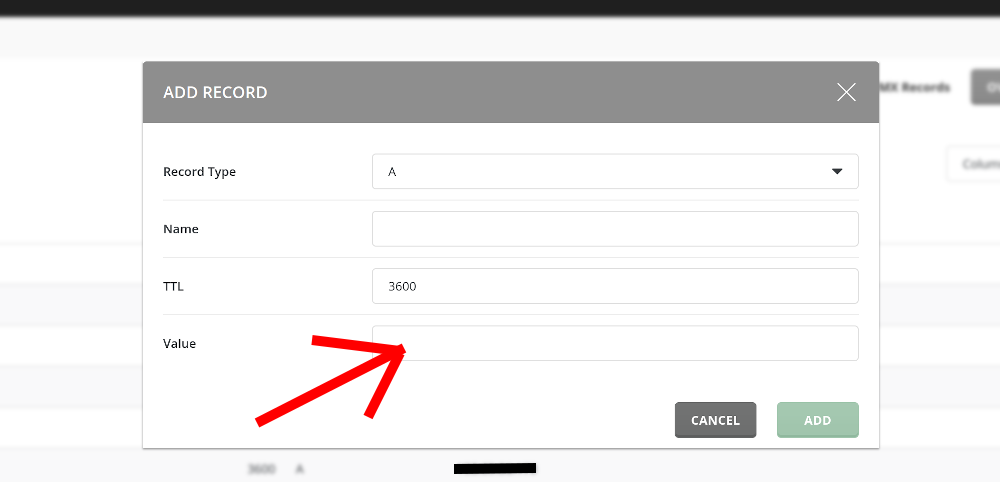
Then click the Add record field.
- Type: CNAME
- Host: www
- Is an alias of: provide the URL shop.yourshopify.com. Note the full stop (".") at the end.
- Click Add

All the job is done. Have in mind that this could take up to 48 hours for your custom domain to point to your Shopify store.
If you have any problems with your Shopify store, go to the Shopify Help Center.