The idea of LiteSpeed cache is to accelerate your website and make it mush more faster for your users by caching visited pages for re-use. If you start making changes to your website, they won't show up, because the cache continues to serve the older version until you delete or purge the cache. In order to avoid this here are two ways to clear your LiteSpeed cache in order your changes to be visible right away.
How to clear LiteSpeed cache with a plugin?
One of the best ways to clear your LiteSpeed cache is with a plugin / module / extension of your web-based application. The plugin should be already installed and running, which means that it has generated a cache in your server. LiteSpeed plugins are available for good number of popular applications and you can browse the full list here. By using a plugin / module, you can easily clear your LiteSpeed cache from the administration of your system. Even better, some of them have the option to select which part of your website to be cleared (one page, category and so on). If you are on a LiteSpeed Web Server, this cache plugin also provides advanced optimization, tools and features so you can get the most out of your hosting plan. You really need to have it!
Please, see the example below of how you can clean your LiteSpeed cache if you use WordPress plugin.
On the top menu of WordPress, hover over the LiteSpeed icon until the flyout menu appears and then click one of the options Purge.

Other choices on the Manage page can be used to clear specific portions of the cache.
How to clear LiteSpeed cache manually from my hosting?
You can also clear the LiteSpeed cache by deleting the cache files stored in your hosting on the server. To clear the cache manually, follow the steps below:
1. Log to your control panel (cPanel or DirectAdmin).
2. Navigate to File Manager and click in it.
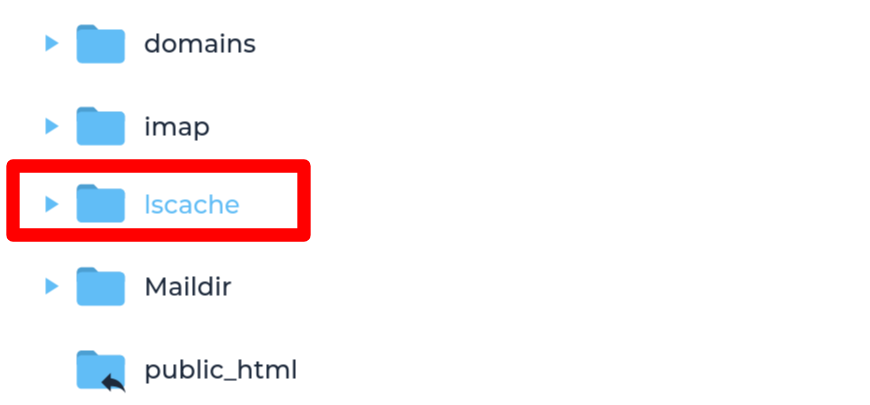
3. Browse to the folder lscache and open it.

No matter is it cPanel or DirectAdmin, the folder is in the root of your hosting account.
4. Use the Select all option to select all files in the right filed.
5. After selecting them, click Delete to remove them all. A confirmation dialog box should appears as well as an option to skip Trash. You should skip it in order delete them permanently.
6. Confirm the action and your ready to go.