Here we will talk about how to restore website data via the well-known JetBackup. It is most recognizable because of its popularity on the cPanel platform. Not long ago, DirectAdmin made JetBackup accessible on their platform, but the application interface is entirely different. We have developed the guide below to show you in-depth how to recover the data of a website, which utilizes a WordPress Hosting service managed by DirectAdmin.
Features of JetBackup in DirectAdmin
JetBackup in DirectAdmin offers its users the following range of features:
- Home Dir: back up and recover files and folders (the website’s source code location
- Cron Jobs: back up and recover Cron Jobs on DirectAdmin.
- DB: back up and recover the website’s database.
- DB Users: back up and recover database users.
- Certificates: backup and recovery of SSL.
- Emails: back up and recover email accounts.
- FTP: back up and recover FTP accounts.
How to restore backups with JetBackup in DirectAdmin
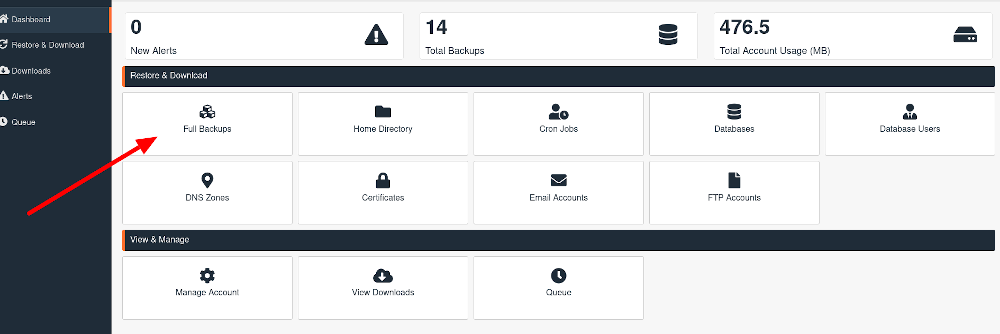
Step 1: You shall get into your DirectAdmin, locate the JetBackup entry, and open it.

Step 2: Click on Total Backups (it is in the middle of the second column).
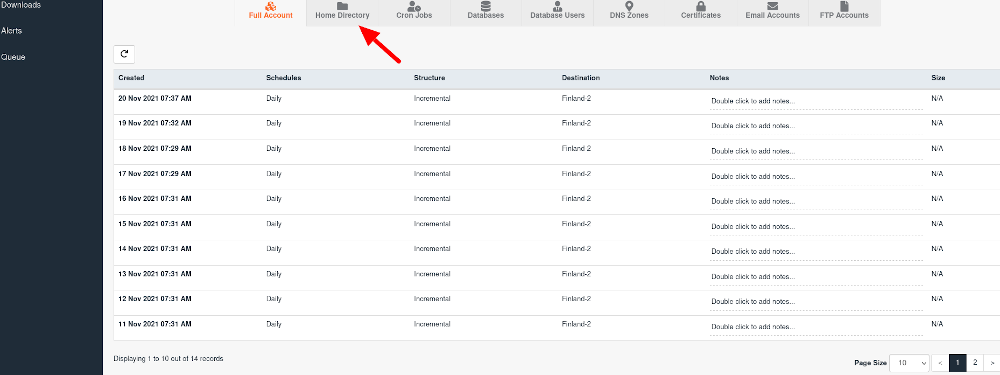
Step 3: Here, click on your username.
Step 4: Now, choose “View Backups.”
Step 5: Choose the backup version you want to restore from the drop-down menu in the “Created” column and click the button that says “Show advanced settings.”
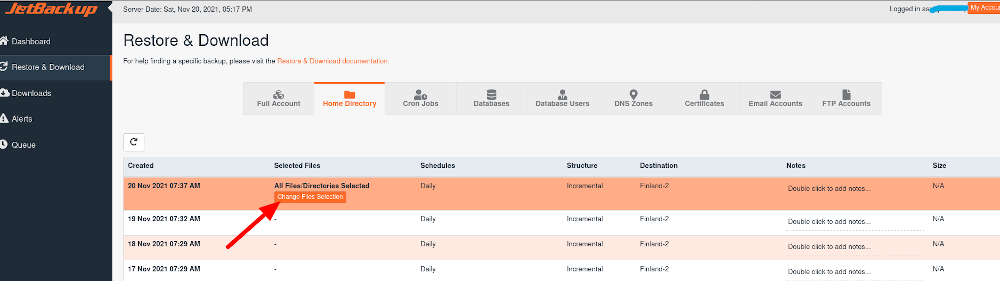
Step 6: Here, first of all, go to the Home Dir tab, then click on the “Change Files Selection” button in the “Select Files” column.
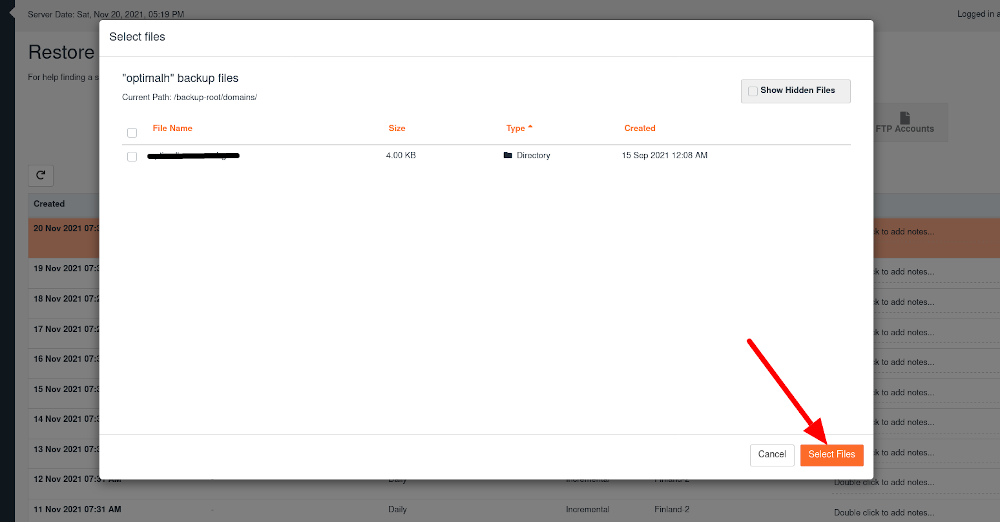
Step 7: Now, go to “domains.” From there, choose the domain name you want to restore. After that, tick the “public_html” directory. If you wish to recover a particular folder or file, open “public_html” locate and select them. If you desire to recover files such as “.htaccess” put a tick in the “Show Hidden Files” section.
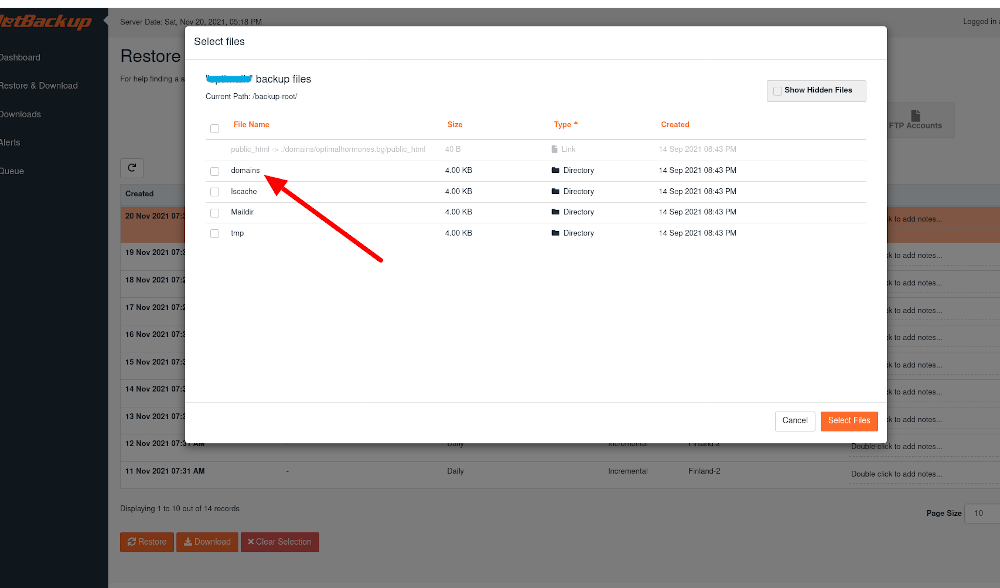
Click on the button that says “Select files” to confirm.
Step 8: Go to the DB tab, locate and mark the database name, which corresponds to the website, whose data you wish to recover.
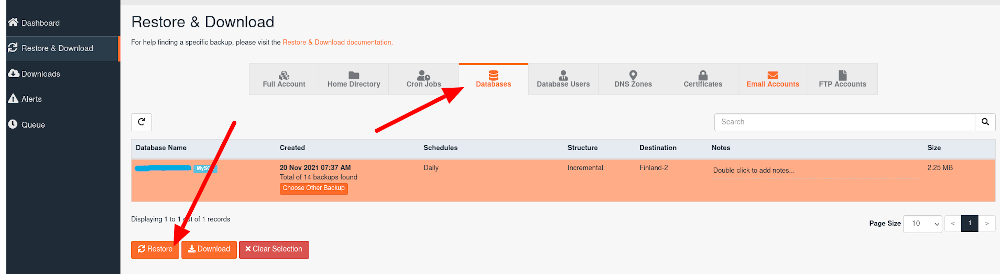
Click on the “Restore” button.
Step 9: The only components you will need to keep are “Home Dire Files” as well as “Databases” The other files you can go ahead and remove by pressing the “Remove items” button.
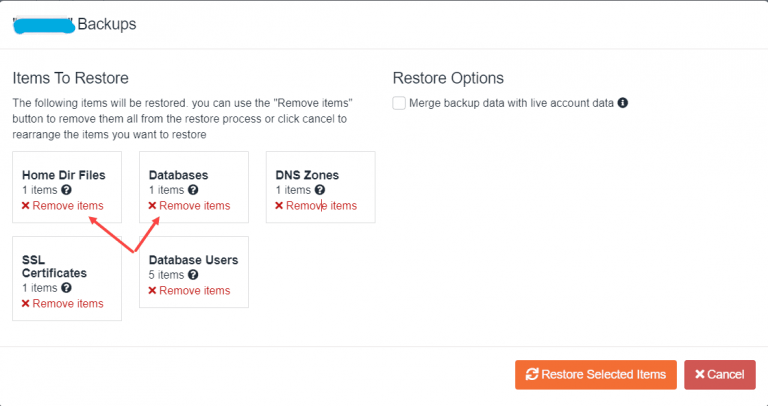
To confirm the recovery, click on the “Restore Selected items” button.
Step 10: By opening the “Queue” tab, you can keep track of the restoration of the backup. The amount of time required for the process is dependent on the amount of data you want to recover.

Step 11: When the process has finished, a similar message shall occur.

We hope our guide has been handy to you. If you have any questions regarding the topic, please don’t hesitate to ask us via the comment section below. Our team wishes you success!
Keep in mind that CooliceHost keeps up to 14 backups you can restore from. Now you have the chance to restore your data and even the entire account form the date you want